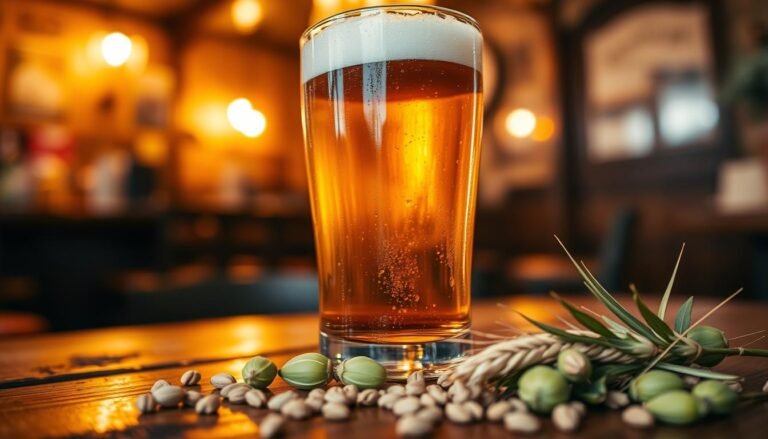
How Beer Is Made Step By Step
We open with a clear map of how simple ingredients turn into a glass with character and taste. Our guide walks through milling, mashing, lautering, boiling, cooling, fermentation, conditioning, and packaging so the flow is easy to follow.
We explain how malt supplies fermentable extract, hops add balance and aroma, yeast creates alcohol and profile, and water carries every element. We also note common controls: mash rests near 100–170°F, boils for 60–120 minutes, ale fermentation around 60–68°F and lagering at colder temps for weeks.
Our emphasis is on repeatable technique and clean sanitation. We set expectations for measurements and timing so you see how the brewing process, ingredients, and careful control shape final taste and quality.
Why the Brewing Process Matters Today
Good technique, consistent data, and clean equipment make the difference between a miss and a memorable brew. We focus on repeatable control so each batch meets target aroma, mouthfeel, and stability.
Precise control reduces off-flavors like DMS and diacetyl. It also lets us hit IBU targets through accurate hop isomerization and keeps oxygen out during cooling and transfer. We track gravity with hydrometers to monitor OG and FG and confirm attenuation.
Water chemistry and mash pH guide extraction of fermentable sugars and protein handling. Calibrated equipment and tight logs keep temperatures and flow steady, shrinking batch-to-batch variation.
- Disciplined routines yield consistent quality from mash to fermentation.
- Timing controls bitterness, flavor, and aroma outcomes.
- Process control minimizes oxidation, DMS carryover, and diacetyl persistence.
- Data—temperature logs and gravity readings—helps our brewers repeat success.
Core Ingredients: Water, Malted Grains, Hops, and Yeast
From water profile to yeast strain, the ingredients we choose shape texture, aroma, and alcohol in every batch. Our focus on raw content and freshness keeps outcomes predictable and stable.
Water minerals and mash pH steer extraction, hop perception, and overall flavor balance. We adjust salts to fit the style so bitterness and malt body sit in harmony.
Malt from barley—or sometimes wheat, oats, or rye—provides starch, enzymes, color, and taste. Kilning levels range from pale and biscuit-like to dark and roasty, and those choices control sugars and mouthfeel.
- Hops supply bitterness through alpha acids that isomerize in the boil and supply complex oils for citrus, floral, pine, or spicy aroma.
- Yeast (S. cerevisiae for ales; S. pastorianus for lagers) turns malt sugars into ethanol and CO2 and creates esters that define character.
Selecting precise combinations of grains, hop varieties, and yeast strains is central to our recipe design. That is why the same four building blocks yield so many styles.
Essential Equipment and Temperatures We Control
Our equipment roster centers on a mash tun, lauter tun, kettle/whirlpool, heat exchanger, and fermenters. Each vessel has a clear job: conversion, separation, boiling, cooling, and fermentation.
We set temperatures to protect enzymes and reach target fermentability. Typical landmarks are mash rests, a mash out near 170°F, and boils of 60–120 minutes.
Fermentation setpoints vary by style. We run ales around 60–68°F, lagers near 50°F, and lagering close to 32–41°F. Controlling heat input and evenness in the mash and kettle prevents scorching and off-flavors.
- We track temperature, volume, and flow so batches are repeatable.
- Strike water calculations and thermal loss estimates are part of our brew plan.
- Sanitary design and routine cleaning keep vessels ready and product stable.
| Vessel | Typical Setpoint | Primary Role | Control Notes |
|---|---|---|---|
| Mash Tun | 148–158°F (rests) | Enzyme conversion | Stirring and insulation for uniform temperature |
| Lauter Tun | Sparge ~168–170°F | Wort separation | Geometry affects runoff and extraction |
| Kettle / Whirlpool | Boil 212°F (60–120 min) | Sterilize, isomerize hops, concentrate wort | Even heat prevents scorch; whirlpool clears trub |
| Fermenters / Cooler | Ales 60–68°F; Lagers ~50°F; Lagering 32–41°F | Alcohol production and conditioning | Precise temp control drives attenuation and body |
From Barley to Malt: The Foundation for Flavor and Enzymes
Barley’s journey into malt sets enzyme levels and flavor building blocks that guide our brewing plan.
Malting has three stages: steeping, germination, and kilning. During germination we activate amylases, proteases/peptidases, and beta-glucanases. Those enzymes later break down starches and proteins in the mash to produce fermentable extract and free amino nitrogen for healthy yeast performance.

Kilning stops growth and fixes color and aroma. Light kilns yield pale base malt with high enzyme power. Darker roasts add caramel, toast, or roast notes while cutting enzymatic strength.
- Base malts supply most enzymes; specialty malts add color and taste without conversion power.
- Highly modified malt can let us use simpler mash schedules and still hit gravity targets.
- Malt quality and storage affect consistency, head retention, and perceived sweetness or dryness.
| Kiln Level | Color / Aroma | Enzyme Retention |
|---|---|---|
| Pale | Biscuity, light cereal | High |
| Amber | Caramel, toffee | Moderate |
| Roasted | Chocolate, coffee | Low |
Grist Bill and Milling: Setting Up the Mash
Our grist bill sets the recipe’s DNA, so we balance base and specialty grains for the gravity, color, and flavor we target.
We mill to crack kernels and expose endosperm while keeping husks intact. Preserved husks form the lauter bed and help prevent channeling in the tun.
We check crush quality to avoid floury fines that clog the bed and oversized pieces that cut extract. Water-to-grist ratios and strike calculations give us a smooth mash-in and control viscosity.
- Grist composition affects mash flow, filter performance, and downstream wort clarity.
- Brewers tune grind gap and may pre-wet special malts to match the lauter system.
- Milling uniformity links directly to predictable efficiency and consistent beer quality.
| Crush Target | Effect on Lauter | Extraction |
|---|---|---|
| Fine (small flakes) | Risk of stuck bed | High early, lower runoff |
| Balanced (broken kernels) | Good bed, stable runoff | Optimal extract |
| Coarse (large pieces) | Fast runoff, low filter | Lower extract yield |
Mashing in the Mash Tun: Converting Starches to Sugars
Our mash stage mixes milled grain with strike water and heat to free fermentable sugars and proteins that guide fermentation and foam. We aim for a consistent mash thickness so enzymes work predictably.
Infusion vs. Decoction
With infusion methods we raise the whole mash in one vessel using hot water. Decoction pulls a portion, boils it, then returns it to lift temperatures and add malt depth. We choose decoction when we want richer body and malt character.
Temperature Rests, Enzymes, and Foam-Forming Proteins
We hold rests between about 100–170°F to activate specific enzymes. Beta-amylase favors lower rests for sugars and fermentability. Alpha-amylase prefers warmer rests for dextrins and mouthfeel.
- Monitor conversion with iodine tests and gravity checks.
- Plan a mash out near 170°F to stop enzyme action and lower viscosity.
- Recirculation and gentle heat prevent stratification and aid clarity.
- Balance mash pH and water chemistry so enzymes stay active and wort supports healthy fermentation.
| Method | Primary Effect | When We Use It |
|---|---|---|
| Infusion | Simple temp control | Modern single-vessel systems |
| Decoction | Enhanced malt depth | Traditional lagers and malty ales |
| Mash Out | Stops conversion | Before lautering |
Lautering: Separating Sweet Wort from Spent Grain
Lautering turns a slack mash into a clear, fermentable wort through careful drainage and rinsing. We move the full mash to the lauter tun and let the grain bed settle. The bed becomes a natural filter that protects clarity.
Mash Out, Recirculation, and Sparging
We perform a mash out near 170°F to stop enzymes and thin the mash. Then we vorlauf—recirculating the first runoff—until the wort runs clear.
Sparging uses measured hot water and steady flow to rinse remaining sugars. We control rate to avoid channeling or stuck beds and to limit tannin pickup.
Clarity, Yield, and Spent Grain Uses
We monitor runoff clarity and gravity to hit pre-boil targets. Grain crush, bed depth, and tun design all affect extraction and runoff stability.
- Balance extraction with gentle flow to protect flavor.
- Adjust sparge temperature and volume to reach gravity goals.
- Collect spent grain for feed, bakery partnerships, or compost.
| Step | Target | Notes |
|---|---|---|
| Mash Out | ~170°F | Stops enzymes; lowers viscosity |
| Vorlauf | Clear runoff | Protects clarity before sparge |
| Sparge | Controlled hot water | Rinse sugars; prevent tannins |
Boiling the Wort: Sterilization, Concentration, and Timing
We set a vigorous boiling schedule of 60–120 minutes to sterilize wort, halt enzyme activity, and concentrate the liquid for predictable gravity and color.
Controlled boiling drives off DMS precursors when we apply steady heat and a strong rolling boil. That prevents corn-like off-aromas and improves final flavor.
Hop additions are timed across the boil to build bitterness through alpha-acid isomerization and to layer flavor and aroma. Longer boil exposure raises IBU contribution; late additions preserve delicate oils.
- Set boil length to sterilize, condense volume, and form hot break for trub compaction.
- Monitor evaporation rate and adjust to hit post-boil volume and gravity reliably.
- Manage finings and boil intensity to aid protein coagulation and clearer wort.
| Boil Length | Primary Effect | Notes |
|---|---|---|
| 60 min | Standard sterilization | Balanced bitterness; preserves some hop oils |
| 90 min | Extra concentration | Higher color, more protein coagulation |
| 120 min | Maximum reduction | Stronger IBU impact; watch for darkening |
We finish the boil with a rapid whirlpool and quick cooling plan to protect hopping outcomes and set the beer up for clean fermentation. Consistent boiling keeps batches repeatable across our brewing process.
Hops in the Boil: Bitterness, Flavor, and Aroma
We use scheduled hop additions to dial in bitterness, mid-boil character, and late aroma. This section explains why timing, alpha-acid levels, and hop oils matter during the boil and how they shape final balance against malt and residual sugar.
Bittering, Flavor, and Late Additions for Aroma
Early additions supply firm bitterness because alpha acids (6–16%) isomerize in boiling wort into iso-alpha acids. Mid-boil hops layer flavor compounds, while late additions and whirlpool hops preserve fragile oils.
Aroma hops commonly contain more than 1% essential oils—hundreds of compounds like myrcene and linalool. We keep late additions short on boil time to retain citrus, floral, or tropical notes without excess bitterness.
Alpha Acids, Isomerization, and IBU Targets
Iso-alpha acids are the measurable bittering agents; IBU correlates to mg/L of those compounds. Boil duration and vigor change hop utilization, so we adjust additions to hit IBU targets that suit the malt bill.
- Segment timing: early for bitterness, mid for flavor, late for aroma.
- Longer boiling increases bitterness but strips aroma; short contact preserves oils.
- Higher gravity and a fierce boil reduce utilization; we compensate in the recipe.
- Late-kettle and whirlpool hops give intense flavor with softer bitterness; dry hopping is a post-boil option for maximal aroma.
Whirlpooling and Rapid Cooling: Managing Trub and Oxygen
B
We focus the end of the boil on clearing solids so fermentation starts clean and predictable. A calm whirlpool gathers trub—protein and hop solids—into a central cone. That leaves clearer wort for transfer and reduces off-flavor risk.
Trub removal and vessel choices
We use kettle whirlpools or dedicated whirlpool tanks depending on scale. A hop back with whole cones adds fresh hops aroma without extra bitterness. Brewers choose options by style and capacity.
Cooling, pitching, and oxidation control
Heat exchangers drop wort to pitching temperature quickly and safely. We repurpose the warmed water to improve brewhouse efficiency. During hot-to-cold transfer we limit oxygen pickup to protect flavor and shelf life.
| Vessel | Primary Role | Typical Rest Time | Notes |
|---|---|---|---|
| Kettle Whirlpool | Settle trub | 10–30 min | Simple; forms a trub cone for clearer runoff |
| Dedicated Whirlpool | Extended separation | 15–45 min | Better clarity; holds larger volume |
| Hop Back | Boost aroma | 5–15 min | Whole hops impart fresh aroma without long boil contact |
| Plate Heat Exchanger | Rapid cooling | Seconds at flow | Hits pitching temperature; warmed water reused |
Fermentation: Yeast Turning Sugars into Alcohol and Carbon Dioxide
When yeast meets cooled wort, a controlled chemical ballet begins that defines aroma, body, and alcohol level.
We pitch a measured, healthy yeast population into oxygenated wort so fermentation starts strong. Primary fermentation produces ethanol and carbon dioxide while generating heat and visible krausen.
We manage temperature to shape esters and flavor: warmer ales (60–68°F) show fruity notes, while cooler lagers (~50°F) stay cleaner. We monitor gravity decline, krausen height, and CO2 evolution to track progress.
- Pitch the right yeast rate and oxygenate early, then exclude air to prevent oxidation.
- Watch attenuation and flocculation—strain choice affects final body and clarity.
- Know primary fermentation is nearly done when gravity stabilizes over two checks, then move to conditioning.
| Attribute | Ale (S. cerevisiae) | Lager (S. pastorianus) |
|---|---|---|
| Typical Temp | 60–68°F | ~50°F |
| Flavor Impact | More esters, fruity | Cleaner, subtle |
| Fermentation Time | About 5–10 days | Longer, often cooler conditioning |
Sanitation and careful transfer protect yeast performance and beer stability. Good fermentation control links our process to repeatable quality and the profile we target.
Aroma and Off-Flavor Control: DMS, Diacetyl, and Clean Processes
We keep aroma clean through targeted controls at the kettle, during fermentation, and in transfer. A steady, rolling boiling profile drives off DMS precursors and sets a stable wort baseline.

Healthy yeast performance cuts diacetyl naturally. We pitch correct cell counts, oxygenate early, and hold a short warm rest when needed so yeast reabsorb buttery diketones before cold conditioning.
Sanitation and closed transfers prevent contamination and oxygen pickup. Our brewers follow strict cleaning cycles and use sealed pumps to protect flavor and shelf life.
- Control boil vigor and venting to remove volatile precursors.
- Manage fermentation temperature to avoid solvent notes and stress compounds.
- Use sensory checkpoints—smell, gravity, and krausen—to decide rests or extended conditioning.
| Off-Flavor | Common Cause | Primary Control |
|---|---|---|
| DMS (cooked corn) | Incomplete boil or slow chilling | Rolling boil; rapid cooling and good evaporation |
| Diacetyl (buttery) | Early yeast stress or incomplete reduction | Healthy pitch, warm rest/kraeusening, conditioning |
| Oxidation (papery) | Air exposure during transfer | Closed transfers, low-oxygen packaging |
Conditioning and Maturation: From Green Beer to Refined Flavor
We guide green beer through a quiet maturation stage where flavors align and clarity improves. This final fermentation period lets yeast finish work and remove off‑notes before packaging.
For lagers we lower temperature to about −1°C to 5°C and hold for weeks. Cold lagering polishes mouthfeel, lowers diacetyl, and produces a clean finish.
Lagering, Kräusening, and Secondary Fermentation
Kräusening means adding a small amount of actively fermenting wort to build natural carbonation and help yeast reduce diacetyl. We schedule secondary fermentation or rests based on stable gravity and sensory checks.
Dry Hopping, Barrel Aging, and Flavor Complexity
Dry hopping boosts aroma without extra bitterness and is timed to protect volatile oils. Barrel aging layers vanillin, toast, and spirit notes; we inspect barrels for cleanliness and past fills to manage flavor risk.
- Conditioning goals: clarity, flavor integration, and reduction of fermentation byproducts.
- Protect beer freshness with low‑oxygen transfers and measured temperature control.
| Method | Temp Range | Primary Benefit | Typical Time |
|---|---|---|---|
| Lagering | −1°C to 5°C | Smoothness, clarity | 2–8 weeks |
| Kräusening / Secondary | Fermentation temp (varies) | Natural carbonation, diacetyl reduction | Days to 2 weeks |
| Barrel / Dry Hop | Cellar temp / ambient | Aroma layering, complexity | Weeks to months |
Measurements That Guide Us: Gravity, Attenuation, and ABV
Precise measurements steer a brew from guesswork to a predictable final profile. We log original gravity (OG) before we pitch yeast and a final gravity (FG) when fermentation finishes. Those two readings give us alcohol by volume and percent attenuation for process control.
Original Gravity, Final Gravity, and ABV Calculations
OG measures extract in the wort; FG shows remaining sugars after fermentation. ABV is calculated from OG and FG and helps us confirm style targets and legal labeling. Attenuation equals extract consumed as a percent, which tells us how dry or full the finished beer will be.
Hydrometers, Degree Plato, and Consistency Checks
We use hydrometers and Plato readings interchangeably, converting between specific gravity and degrees Plato to track extraction and fermentation progress. Typical pitch rates are about 0.75 million cells/ml/°P for ales and 1.5 million for lagers.
| Metric | What It Shows | Action |
|---|---|---|
| OG | Pre-pitch extract | Verify mash efficiency; adjust in recipe logs |
| FG | Residual sugars | Decide conditioning or packaging |
| Apparent ABV | Alcohol content | Labeling and QA confirmation |
| Attenuation | Percent sugars consumed | Assess yeast health and expected mouthfeel |
Our sampling schedule, calibration habits, and consistent record-keeping let us spot deviations and apply corrective actions in future brews. Stable FG plus sensory checks signals readiness for conditioning and packaging.
Carbonation and Packaging: Bottles, Cans, Kegs, and Clarity
Packaging and carbonation finalize our craft; they lock in freshness and shape the first sip.
We choose format based on stability, portability, and presentation. Bottles suit small runs and retail shelves. Cans bring light and oxygen protection for active lifestyles. Kegs fit on-tap service and short-term freshness.
Force Carbonation for Speed and Brightness
We use force carbonation when we need a fast turnaround and a bright, consistent finish.
High-pressure carbon dioxide in a sealed tank hits target volumes quickly and reduces contact with air. That preserves delicate aroma and produces tight bubbles for a crisp mouthfeel.
Bottle Conditioning, Cask Ale, and Natural CO2
For natural sparkle, we add measured sugar and yeast at packaging for secondary fermentation. This method builds gentle carbonation and softens mouthfeel over time.
Cask-conditioned ale follows the same idea in a cask with minimal CO2 pressure, yielding a softer, warmer presentation and more active yeast in the package.
- Closed transfers and CO2 purge protect finished beer from oxygen pickup.
- Clarity choices range from filtration to leaving a style-appropriate haze.
- We verify seams, closures, and carbon levels during QA checks.
- Packaging line hygiene and routine verification protect shelf life and flavor.
| Format | Benefit | Typical Use |
|---|---|---|
| Bottle | Retail-friendly, suitable for bottle conditioning | Small batches, specialty releases |
| Can | Blocks light, good for portability | IPAs, session ales, broad distribution |
| Keg | Low waste, on-tap freshness | Taprooms, draft service |
| Cask | Natural CO2, softer carbonation | Traditional ale service |
Variations in the Brewing Process: Styles, Adjuncts, and Wild Fermentations
Using wild strains and adjuncts expands what our brewhouse can deliver in aroma and mouthfeel.
We work with mixed and spontaneous fermentations that include Brettanomyces and lactic bacteria. These organisms bring complex acidity and funk found in traditional lambic-style beers and modern sours.
Adjuncts—fruit, spices, coffee, and cacao—let us layer flavor without drowning the base. Blends of wheat and barley change head retention, body, and fermentability for certain styles.

- We pick yeast strains and bacteria to match the style intent, from clean ale projects to wild fermentations.
- Sanitation and physical segregation protect our core lines from cross-contamination.
- Experimental batches teach us tuning points that improve the core process and quality control.
| Approach | Primary Microbes | Adjunct Use | Sanitation Notes |
|---|---|---|---|
| Pure Culture | S. cerevisiae / S. pastorianus | Minimal; hops-focused | Standard CIP; shared lines ok with care |
| Mixed Ferment | Brettanomyces + Lactobacillus | Fruit, oak, spices | Dedicated tanks; segregated lines required |
| Spontaneous | Ambient microbes | Seasonal fruit, wheat blends | Isolated coolship and long aging |
We balance risk and creativity so our beers hit target flavor and remain stable on shelf. That disciplined approach helps us scale wild projects without harming core runs.
How Beer Is Made Step By Step: A Practical Walkthrough We Follow
We run a tight brew day routine that turns milled grain and measured water into a predictable wort ready for yeast.
First, we mill the grist and heat strike water to the planned temperature. We mash at enzymatic rests to free sugars and confirm conversion with an iodine check. A quick mash out eases run-off and protects enzymes.
During lautering we recirculate gently and sparge to collect clear wort at target gravity. Then we boil for 60–120 minutes, adding hops on schedule to build bitterness, flavor, and aroma while controlling evaporation.
After the boil we whirlpool to compact trub, cool rapidly with a heat exchanger, and reuse warmed water where possible. We oxygenate and pitch healthy yeast at the right temperature, then monitor gravity and flavor as fermentation progresses.
When fermentation completes we rack to condition, then package using force carbonation or bottle conditioning to hit dissolved oxygen and clarity goals.
| Checkpoint | Target | Primary Action |
|---|---|---|
| Milling & Strike | Crush quality; strike temp | Mill grain; heat water |
| Mash | Enzymatic rests, conversion | Hold rests; iodine/gravity check |
| Lauter & Sparge | Clear wort; target gravity | Recirculate; controlled sparge |
| Boil to Pitch | 60–120 min; cool to pitch | Hop schedule; whirlpool; rapid cooling |
| Fermentation & Package | Stable FG; desired carbonation | Temp control; condition; package |
From Brew Day to First Sip: Bringing It All Together
A single, steady routine—measured temps, clean transfers, and yeast care—turns raw wort into a finished beer that matches our intent.
We recap how each step of the brewing process shapes taste and stability. Wort quality, clean water, correct temperature control, and verified OG/FG readings guide fermentation and reduce defects like DMS or diacetyl.
At the end, conditioning, carbon control, and package integrity protect flavor in a bottle or keg. Mash choices and grain balance set body, head retention, and overall taste. Ales and lager follow different pacing, yet both demand the same attention so the first sip meets expectations.